Thursday, August 27, 2009

wedding bells!


My pastry students have worked hard the past five months and here's their reward--Wedding cake week!! I think it's the week that all Pastry students wait for.


My students dove into this project with their usual enthusiasm. For many of them, this was their first experience with fondant, gum paste and royal icing.


They made their cakes in pairs, baking their cakes and making their buttercream during the first class. The second class was spent torting, filling, icing and freezing their cakes.


Guest chef Tracy Auseklis from Buttercream Studio (http://www.thebuttercreamstudio.com/) gave them instruction in creating beautiful gum paste flowers and bows.


Then it was finally the big day-- covering and stacking their cakes, and applying the final decorations.


The students made some beautiful cakes! There was a citrus chiffon, a ginger chocolate, a raspberry mousse... they really got into the royal icing "dots", luster dust... and did some creative banding and flowers.


I think it was a week everyone can be proud of!

Tuesday, June 30, 2009

a sweet party!


My professional pastry students at Tante Marie's Cooking School are half way through their six month course, so it was time to celebrate with a party!


They created a buffet of sweets, invited their families and friends, and showed off their talents!


Above, a mini hazelnut cupcake with caramel buttercream and a spun sugar garnish. At right, a delicious cookie plate with cornmeal, currant and rosemary cookies, linzer cookies and whole wheat cocoa nib sables.


Everyone loved the coconut frangipane petits four (above) and the raspberry ganache tartlets.


Porcelain spoons with a luscious bite of passion fruit bavarian, white chocolate mousse and chocolate mousse!


Little buttermilk cupcakes with sugared flowers were beautiful....


Mini pavlovas in two flavors. The chocolate pavlova with ginger cream and cherries was a big hit.


There were miniature choux treats, like the Gateau Paris-Brest above,
gorgeous lemon and passion fruit meringue tartlets, and TKOs (Thomas Keller Oreos) and meyer lemon sandwich cookies that I wanted to slip into my purse for a midnight snack!


The students have a two-week vacation (hope they're practicing!) then it's on to laminated doughs!

Wednesday, June 17, 2009

earth mother


It could be the perfect June day... when I get to go out to my tiny garden and plant lemon verbena.
I had the best tea of my life after a dinner party of cooking teachers at Mary Risley's home in San Francisco. Someone went into Mary's awe-inspiring garden, plucked a handful of lemon verbena leaves, put them in a clear glass teapot and added boiling water. The bright green leaves floating in the water and the herbal, lemony scent and flavor of that tea were memorable!
Or try this amazing ice cream....
Lemon Verbena Ice Cream
2 cups cream
2 cups milk
1vanilla bean, halved and scraped
30 lemon verbena leaves, chopped
10 egg yolks (you can use fewer for a less rich ice cream)
1 cup sugar
Heat the cream, milk, vanilla bean and lemon verbena leaves. Let this mixture steep for about 2 hours, or until you love the flavor. Reheat until hot.
In a separate bowl, whisk the yolks and sugar until well blended. Temper the eggs by whisking some of the hot cream into them, then pour the mixture back into the pot.
Cook the mixture over medium heat, stirring constantly, until it coats the back of a wooden spoon. Don't boil or let it reach over 180F. Strain into a container and chill until cold.
Pour into ice cream freezer and freeze.


It's so effortless to grow herbs, and takes so little space. A tiny plot in your backyard, a sunny pot on a deck....they are very forgiving. It's so lovely to leave the world of technology and pick a handful of your very own herbs for a delicious salsa verde to drizzle over the grilled chicken for dinner. It's a connection to the earth that we can all have.


Thursday, May 28, 2009

sweet perfection


Ahh... the sweet perfection of the madeleine. Just a simple, no-nonsense, buttery little cake. A tiny bit crispy on the outside. Moist and tender on the inside. In a perfect world, they'd be coming out of the oven every day just as you sank down in your easy chair with a cup of tea!
It's so easy to make this recipe your own, by adding zest or cinnamon or caramom... whatever your heart desires!

Madeleines
113 grams (1/2 cup) unsalted butter, melted
130 grams (1 cup) all-purpose flour
1/2 teaspoon baking powder
1/8 teaspoon salt
3 large eggs, at room temperature
133 grams (2/3 cup) granulated white sugar
1 teaspoon pure vanilla extract
Preheat oven to 375-degrees. Generously butter two 12-mold Madeleine pans and dust with flour.
Melt butter and allow to cool.
Place flour, baking powder and salt in a small bowl and whisk until blended.
In the bowl of your electric mixer, beat the eggs and sugar at medium-high speed until the mixture has tripled in volume and forms a thick ribbon when the beaters are lifted (about 5 minutes). Add the vanilla extract and beat to combine
Sift a small amount of flour over the egg mixture and, using a large rubber spatula, fold the flour mixture into the beaten eggs to lighten it. Sift the rest of the flour over the egg mixture and fold in being sure not to overmix or the batter will deflate.
Whisk a small amount of the egg mixture into the melted butter to lighten it. Then fold in the cooled melted butter in three additions. Cover and refrigerate for at least 30 minutes, or several hours, until slightly firm.
Drop a generous tablespoonful of the batter into the center of each prepared mold, leaving the batter mounded in the center. (This will result in the classic "humped" appearance of the madeleines.)
Bake the madeleines for 11 to 13 minutes, until the edges are golden brown and the centers spring back when lightly touched. Do not overbake these cookies or they will be dry.
Remove the pans from the oven and rap each pan sharply against a countertop to release the madeleines. Transfer the madeleines, smooth sides down, to wire racks to cool.
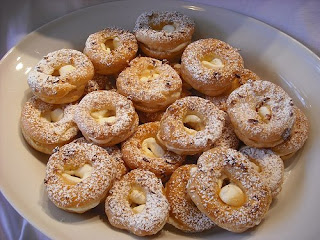
When serving dust with confectioners sugar.
Yield: 24 - 3 inch (8 cm) madeleines.


Friday, May 8, 2009

The Good Life


It's nice being a pastry teacher.

That way, when it's 4:00 in the afternoon and you have a hankering for a chocolate souffle, you can just make one.... and tell people you're recipe testing. Two hours later when you're making tuiles, you can pull out that same story and it still works.

You do have to fit a salad in there somewhere... and maybe climb a few trails with your dog or swim a few laps, but it seems worthwhile.

My house is a very popular place for teenage boys after school, because they never know what they'll find.
Sometimes it's a crusty baguette, fresh from the oven and slathered in butter. Othertimes it's nutty financiers. They don't even mind snacking on the scraps when I'm trimming a cake. Their moms are used to getting bags filled with cupcakes or slices of pie.
I usually get pretty good reviews from the 16-year old set... who are good judges of the Yum Factor of a dessert. They encourage me to keep it simple... a good lesson in pastry and in life.


Wednesday, April 29, 2009

Chocolate Bliss

Truffles are one of those little secrets you can pull out of your sleeve to delight people. They are incredibly easy to make.... can be flavored a zillion different ways... and packaged in a small box or cellophane bag, are a lovely little gift.
Here's a perfect bittersweet chocolate truffle recipe from Alice Medrich. It uses an egg for its silken texture, which is craftily cooked for people who object to eating raw eggs.

Bittersweet Chocolate Truffles

8 oz bittersweet or semisweet chocolate, finely chopped
6 Tbsp butter, chopped
1 egg yolk, room temp
¼ cup boiling water
1/3 cup cocoa powder

To make truffles, place chocolate and butter in bowl set in a skillet of barely simmering water. Stir frequently until melted and smooth. Set aside, but leave skillet on low heat.

Place egg yolk in small bowl. Gradually whisk in boiling water. Place bowl in skillet and stir constantly until yolk mixture thickens slightly to the consistency of light cream and registers 160-degrees. Remove and scrape mixture over melted chocolate. Stir gently, just until egg is completely incorporated and mixture is smooth. Pour through strainer into clean bowl. Chill 2 hrs.

To form truffles, sift cocoa into pie plate. Dip melon baller or small spoon into hot water, wipe off water, and scrape across surface of truffle mixture to form a rough 1” ball. Pinch into shape if necessary; these should not be perfectly round. Deposit truffle into cocoa powder, coating it.

Store in refrigerator up to 2 wks or freeze 3 mos.

(from Chocolate Holidays by Alice Medrich)

Wednesday, April 22, 2009

Just Desserts


Man, it was hot this week for pastry chefs. My poor pastry students battled the elements when San Francisco turned into LA Monday night and boasted 95+ degrees at 6:00pm. They valiently tried to line tart shells with pate sucree... with very little success. It would have been the perfect bread-baking kitchen!


So tonite... when San Francisco returned to its cool, foggy, breezy self... we tackled the tarts once more.

Such lovely results. Students sheeted pounds of sweet pastry.... arranged fresh fruit on frangipane or pastry cream... poured ganache or lemon curd into shells to bake.


Their patience and attention to detail paid off as their creations began to line up in the front kitchen, one by one. Maybe it just takes a slogging-through-the-mud day like Monday to appreciate the beauty of Wednesday's tarts!